Tuesday, November 9, 2010

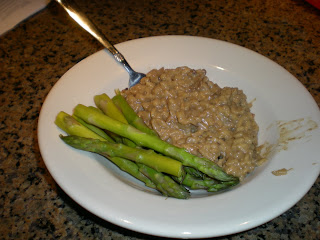
Creamy Goat Cheese Polenta

I always love polenta, but this is so delicious to serve with the short ribs. Another future recipe will suggest making a ragu/bolognese sauce and serving it over the polenta.

Because this polenta takes so little time, you can prepare it right before you are ready to serve your meal. With the short ribs, I prepared this while the ribs were sitting out of the oven for 20 minutes.

Adapted from The Pioneer Woman Cooks

Ingredients:
1 cup yellow cornmeal
1 tsp salt
2 tbs butter
4 oz goat cheese

1. Bring 4 1/2 c of water to a boil. Add cornmeal to the water in a thin stream, whisking constantly to avoid lumps.

2. Reduce heat to a simmer and cook for 15 minutes, adding salt and any extra tbs of water as needed.


3. When polenta is done, stir in goat cheese and butter. Add salt to taste. Serve immediately!

Braised Short Ribs

These ribs are a little bit complicated, and have to cook for a few hours, so they are perfect for a Sunday dinner. They are delicious when served with polenta (see the next recipe) or with mashed potatoes, and with a vegetable like fresh green beans or broccoli. This recipe, along with the next two, were part of a dinner I served that only (ha! only) took me about 4 hours to make.

Adapted from The Pioneer Woman Cooks

Ingredients:
8 whole beef short ribs
Kosher salt and pepper to taste
1/4 c All-Purpose flour
6 pieces Pancetta, diced (or you can do what I did- go to Trader Joes and pick up a package of already diced pancetta)
2 tbs Olive Oil
1 whole medium onion, diced
3 whole carrots, diced
2 whole shallots, diced
2 cups red or white wine (I went with red)
2 cups beef or chicken broth (I went with beef)
2 sprigs thyme
2 springs rosemary

Preheat oven to 350 degrees.

1. Salt and pepper the ribs on all sides, then dredge in flour. Set aside.

2. In a large dutch oven, cook the pancetta over medium heat until completely crispy and all of the fat is rendered. Remove pancetta and set aside; do NOT discard grease.


3. Add olive oil to pan with pancetta grease, raise heat to high. Brown ribs on all sides (this should only take about 45 seconds per side, if your oil has been heated). Remove ribs and set aside, turn heat down to medium.


4. Add onions, carrots, and shallots to pan and cook for 2 minutes. Pour in wine and scrape bottom of pan to deglaze. Bring to a boil and cook for 2 minutes.


5. Add broth, 1 tsp kosher salt, and plenty of fresh ground pepper. Add ribs to the liquid- we want them almost completely submerged, so if needed, add more broth/wine. Add the rosemary and thyme sprigs to the liquid.


6. Put on the lid, and cook in the oven for 2 hours. Then reduce heat to 325 degrees, and cook for an additional 30-45 minutes. Ribs should be fork-tender and falling off the bone. Remove pan from oven and allow to sit for at least 20 minutes. Skim the fat off of the top (or, let refrigerate if you have time and remove solid fat from the top).


7. Serve with polenta or mashed potatoes!

Auntie Flo's Porkchops

I recieved this recipe from Pat (our neighbor from Hyde Park), who told me that she used to make this when she got home late and had 3 hungry kids. Since Alex eats about the same amount as 3 hungry kids, I figured this would be perfect! Since this takes very little time (and very little mess) to make, I kind of love it.

From Pat Nau

Ingredients:
6 thick butterfly pork chops (no bones)
2 cans apple pie filling
2 boxes stove top stuffing
Cinnamon (to taste)
2 tbs olive oil
Butter
Salt, pepper, paprika

1. Season the chops on both sides with salt, pepper, and paprika. Make the stuffing according to the directions on the box. Let the stuffing sit to the side while you prepare everything else. Spoon the pie filling into a casserole dish, add cinnamon to taste. Spread pie filling so that the entire bottom of the pan is covered.

2. Heat the oil in a large non-stick frying pan. When the oil is hot and starting to bubble, add chops. Cook until they are browned on both sides (if your oil is hot enough, this should only take a minute or two, so keep an eye on it).

3. Place chops on pie filling. Spoon the stuffing over the chops, spread to cover. Dot the top of the stuffing with pats of butter, season with paprika to taste.

4. Cover with foil and bake for 35 minutes; remove foil and bake for 10 minutes longer, then serve.

Wednesday, July 21, 2010

Risotto!

Although I feel like I've been doing nothing with my life besides studying for the past month and a half, I have taken some time to cook so that I don't completely lose my mind. The bar is less than a week away, and hopefully by the end of it I will be a licensed attorney. In the meantime, I've managed to a) accumulate blisters all over my hands, b) fail to answer my phone/call people back in weeks, c) cry more times in the past month than in years, and d) accumulate a pretty impressive amount of notecards (see Exhibit A for evidence).


While that isn't fun, what is fun is food. In my mouth. And my stomach. And all over my face.

Dried-Porcini-Mushroom Risotto with Goat Cheese
Adapted from Quick from Scratch Italian Cookbook

Ingredients:
1 c dried porcini mushrooms (approx. 1 oz) (or others if you prefer other flavors)
3 c hot water, more if needed
3 1/2 c canned low-sodium chicken broth or homemade stock, more if needed
3 tbs olive oil
1 onion, chopped
5 cloves garlic, minced
2 cups arborio rice
1 1/4 tsp salt
2 tbs butter
1/4 tsp fresh-ground black pepper
2 oz mild goat cheese, crumbled
Grated Parmesan for serving

1. Put the dried mushrooms in a medium bowl and pour the hot water over them. Soak until softened, about 20 minutes.


2. Pour the mushrooms/liquid through a strainer into a saucepan. Add the broth to the mushroom liquid in the saucepan and bring to a simmer. Chop the reserved mushrooms.


2. In a medium pan, heat oil over moderately low heat. Add the onion and garlic and cook, stirring occasionally, until the onion is translucent, about 5 minutes. Add the chopped mushrooms, the rice, and the salt and stir until the rice begins to turn opaque.


Note: the recipe claims that it only takes about 2 minutes for the rice to turn opaque. I say- LIARS. It takes me about 20 minutes, which could be due to poor quality pan or something, but you really want to make sure you cook it long enough that you see a change in color. Otherwise it takes forevvvver for the rice to soak up the liquid enough to soften. You can't really overcook the rice, so if in doubt, leave it on the heat.


3. This is important- add about 1/2 cup of the simmering broth and cook, stirring frequently, until the broth has been completely absorbed. DO NOT just keep pouring broth in there- it won't absorb properly, and your rice will have a nice crunchy texture. Keep adding about 1/2 cup at a time, until it is all absorbed.


4. This should take about 25-30 minutes, perhaps longer depending on your heat. If the simmering liquid isn't enough, bring some more broth and/or hot water to a simmer and keep adding it. By the end, the broth that hasn't been absorbed should be thickened by the starch from the rice.


5. Stir in the butter, the pepper, and the goat cheese. Serve with grated parmesan.

Wednesday, June 30, 2010

Bruschetta

This isn't so much Mom's bruschetta (which always makes people spill the food all over themselves in a rush to get it into their mouths), but something using some stuff left over in my fridge. I have to double check, but I think the main difference is just the cheese. Anyway, I think this is pretty good for you, and it's really easy and tasty (and if you eat enough, it transforms from an appetizer into an entree). And I may or may not have spilled some on myself in my rush to get it to my mouth...

Ingredients:

2-3 tomatoes (I used roma, but whatever you like) OR 1-2 bell peppers (for the non-tomato eaters, aka my boyfriend)
Goat cheese
Basil
A baguette!

1. Cut baguette into 1 inch slices, lay them down on a cookie sheet. Drizzle both sides of pieces with olive oil (brush it evenly across the surface).

2. Dice tomatoes (I cleaned out the inside of the tomatoes a little bit, cause I'm not a big fan of all of the seeds).

3. If you are making the peppers (instead of or in addition to the tomatoes) cut into long slices (fajita style!), heat 1 tbs of oil in a skillet, and sautee peppers until they have begun to soften. I like to sprinkle the peppers with some seasoning salt to give it more flavor, but up to you.

4. Clean and chop basil- mix the tomatoes, basil, and however much goat cheese you want together in a bowl. If you are making the peppers, just mix the softened peppers and the cheese together.

5. Turn oven on to broil- on top rack, broil baguette slices for a few minutes until it starts to brown, then turn slices over and toast that side. Take baguette slices out, pile your mixture on top of it, and then put it back in the oven for a few minutes until cheese starts to melt.

Munch on the food.

Monday, June 28, 2010

I have a new kitchen!

While I will be downgrading appliances (*sob*), I'm upgrading on counter space! That means more room to roll out dough, more room to prep everything (I may or may not have to invest in another cutting board), and more room to make a mess!

More pictures to come when I get all of my pots and pans in there, but here's a few teasers for you.


Sunday, June 27, 2010

Korean BBQ

Although Tina and I have bonded over many things (including our love of bad movies, our Seattle connection, and our general awesomeness), I think food plays a very large role in our friendship. Epic thanksgiving dinners aside, my introduction to Korean BBQ has made me a very happy face-stuffer.

Although it is really fun to go out to a Korean BBQ restaurant and have that little grill and all those yummy side dishes that Tina has to explain, making it at home is SO fast, SO easy, and SO delicious (and you don't actually have to use a grill either). We can get our chili paste, etc, here at a store called H Mart, but I wonder if Uwajimaya carries it too...


Daeji Bulgogi (Spicy Korean Pork Barbecue)
Note: there are a bunch of different recipes out there, but this one was delicious and easy!

Ingredients:

1 lb pork tenderloin, trimmed (my grocery store doesn't have a butcher, so I had to use pork loin which we pounded flat. It worked, but it makes a big different to have that very thin cut tenderloin).
2 tbs brown sugar
2 tbs low sodium soy sauce
1 1/2 tbs thai chili paste
1 tsp minced peeled ginger
1 tsp sesame oil
1/2 tsp crushed red pepper flakes
3 garlic cloves, minced

Note: this makes "spicy" pork bbq, but I didn't think there was very much heat. This was not that spicy at all (and I'm a wuss), but if you want to adjust heat, either increase or decrease the amount of red pepper flakes and/or the thai chili paste (but I don't recommend it!)

1. Cut pork into thin strips (1/16th inch slices is recommended). Trim fat from sides.


(I know these look like naked mole rats, which is gross, but I promise they aren't...)

2. Combine all ingredients together- mix well, add pork. Cover pork in mixture, set aside in refrigerator for an hour or more to marinate.


Note: the recipe says you should mix it together in a baggie, but I think a bowl is a much easier way to make sure the ingredients are all mixed together and the pork is evenly marinated. Just sayin'.

3. Heat your cooking surface. If using a grill, spray liberally with cooking spray. If using stove top (which I prefer, because it preserves some of the marinade as a sauce for your rice), pour in a 1/2 tbs-1 tbs of vegetable oil and heat a deep skillet. When surface is hot, pour in meat/marinade and cook for 5-10 minutes until cooked through.


Serve with sticky rice (place rice in strainer, rinse under cold water until the water runs clear- it takes away the starch. Then, let the rice sit in the cooking water for 20-30 minutes before cooking according to directions) and with large lettuce leaves to wrap the rice and pork in.


There are these delicious marinated sesame leaves that Tina rustled up at H Mart- I wrap them around the pork and rice too, or just use my fingers to stuff them in my mouth. I mean... I have table manners so that would never happen.

Sunday, May 30, 2010

Whoopsie

So, turns out my spring quarter was pretty busy. Despite the fact that I'm probably writing this solely for myself at this point, I think this is a great way to catalog recipes and remind myself of what did and did not work. So, here's something I experimented with a few weeks ago:

Roasted Chicken with a Mushroom Cream Sauce

Ingredients:
1 whole chicken
Some herbs of your choice
Salt and Pepper
1 Onion and 4 cloves of garlic
Olive Oil
Additional Garlic for the sauce
1 tbs butter
Portobella Mushrooms (you could probably lots of different kinds)
Heavy Cream
White Wine
Chicken Broth
Parsley
Pasta

So, this was kind of a hodgepodge of a recipe that turned out pretty well. Because I am lazy, I used dried herbs instead of fresh ones (which would probably be more delicious), but I think it worked out great.

Dry off your whole chicken (3-4 lbs) with a paper towel so it will brown easier. In a bowl, combine 3 tbs (or so) of the olive oil with 1 tbs of Kosher Salt, 1 tsp of pepper, 2-3 tbs of herbs (I used rosemary, thyme, and sage). Rub the oily herby mixture all over your chicken on all sides (including the inside- just stick your hand right up in there).

Chop your onion into 3-4 big pieces, chop four of your garlic cloves in half, and stick it inside the chicken. You could also add half of a lemon or a carrot or something- this is just going to be aromatic, to increase the flavor of the chicken. We won't actually eat this stuff.

Preheat your oven to 450 degrees. Stick your chicken in a roasting pan (or you could put it on a heavy cookie sheet, just cover it in foil so the grease doesn't smoke up the oven), and let it cook for an hour and fifteen minutes or so (if you want to brown the skin, go ahead and take off the foil near the end. Just keep an eye on it).

While the chicken is baking, make the sauce! I sauteed the mushrooms and 2 cloves of minced garlic w/ 1 tbs of butter until the mushrooms began to soften. Then I poured in some white wine (about half a cup) and let it cook for a minute. Pour in some chicken broth (I'd say around half a cup as well, i was just kind of going for it). Cover the sauce and let it cook for a little while until the liquid has reduced, then mix in a cup of heavy cream.


At this point, you can adjust for volume and thickness. If you like a lot of sauce, add more liquid (taste it for flavor). If you want it to be thicker (like I did), cover the pan and let it cook over low heat (stir it occasionally) until it has started to thicken. Season with salt and pepper, and add in some parsley for good measure. (The picture below is pre-thickening. See how its kind of watery?)


Once your chicken has roasted (use a meat thermometer if you aren't sure), take it out of the oven. VERY IMPORTANT- let it sit for 10-15 mins so the juices can redistribute. If you cut into it right away, all the juiciness is going to come spilling out. While the chicken is sitting, make your pasta.


Cut the chicken into pieces, mix the sauce into the pasta, and stick that chicken right in there! Yum.


(Hairy forearms not included with the recipe)

Saturday, March 27, 2010

3 thoughts on the Pasta with Squash and Pesto...

Okay, three things have occurred to me.

1) The leftovers are reeeally good cold. Like, take it for a picnic in the park good!

2) The recipe said that it made 4 servings. YEAH RIGHT. 3 days later (and 3 meals later) I still have enough to feed me for 4 or 5 days. So this is one of those good make on the weekends and eat during the week meals.

3) I think that next time I make this, I'm going to add some artichoke hearts. I think it would go really well with the pesto, and probably with the squash... That, or do half squash and half artichoke. Yum.

That is all.

Thursday, March 25, 2010

Penne with Butternut Squash and Sage Pesto

So, Alex's mom gave me this cookbook way back in the day, and it made me wonder "is she trying to tell me something?" But then I looked through the cookbook and decided that no, probably not, its just full of interesting and supposedly healthy recipes. The one thing that creeps me out is that it puts all of the meat in quotations (like Ovenfried "Chicken" and Cornbread, or "Meatloaf" and Gravy). Since they substitute weird things like Seitan (WHAT?!) and vegan cream, I'm going to avoid those.

Adapted From Skinny Bitch in the Kitch

Ingredients:
1 box of Penne Wheat Pasta
1.5 lbs (or so) of Butternut Squash, sliced and cut up into 1-1.5 inch slices
5 tsp sea salt
Ground black pepper
2 shallots, thinly sliced
2 tbs extra virgin olive oil
Sage pesto
sliced toasted almonds for garnish (optional)

For the pesto:
1/4 cup whole almonds
1 1/2 cup fresh sage
3/4 cup fresh parsley
2 cloves garlic
3 oz light cream cheese
1/2 tsp sea salt
1/8 tsp pepper
2/3 cup extra virgin olive oil

First off, make the pesto first. I actually doubled the pesto recipe because I like leftovers, and my box of pasta was bigger than the recipe called for.

1. In a food processor, combine the almonds and garlic and pulse to roughly chop. Add the sage and parsley (and seriously, don't forget to wash your herbs) and pulse to chop. Add the cream cheese, salt, and pepper and process into a paste.


2. With the motor running, slowly pour in the olive oil, processing until the oil is fully combined. Use immediately or transfer to a small container, cover with a thin layer of olive oil, and store in the fridge for 3-4 weeks.


3. After your pesto is made, get your water boiling and start the pasta. Add about 1 1/2 tsp of the sea salt to the water beforehand. While your pasta is cooking, make the squash!

4. Heat the olive oil in a 10-12 inch skillet over medium-high heat. Add the squash and cook, stirring occasionally, for 4 or 5 minutes.


Note: I found these pre cut-up squash pieces, and I was SO happy! Let me tell you, I have had some epic battles with peeling squash.

5. Stir in the shallots, pepper, and the remaining 1/2 tsp salt and cook, stirring occasionally, until the squash and shallots are tender, for 1-2 minutes. Remove from heat and set aside.


6. When the pasta is done, drain it. Reserve about 1/2 cup of the pasta water in case your pesto mixture is kind of dry. Return the pasta to the pot and stir in the pesto. Add in the squash mixture, and add some of the pasta water if you feel like it (I didn't). Serve!


Here we go again

Okay, now that I'm back from my spring break of sitting on my butt, eating wings, and drinking beer, we are going to return to the original goal of this blog... teaching Maddie how to cook HEALTHY food. Yeah, I'm thinking "oh yeah!" too. Anyway, new (very healthy) meal to come tomorrow. Until then, say goodbye to the things I made before spring break...


And hello to things that won't clog our arteries.

Sunday, March 7, 2010

Pretzels!

Because it is exam time, I have slacked off and entered the world of frozen pizzas, delivery chinese food, and diner fare. We did have an amazing experience last night though- dinner at my professor's house with 4 different kinds of appetizers (like duck confit on toasted baguette with a bing cherry jam and a platter of cheese that made my heart smile), an awesome entree that included what appeared to be sauteed brussel sprouts (btw, YUM) and a fancy pants lemon dessert accompanied by biscotti and a variety of chocolates. The wine was amazing and the company was great, and in between worrying about damaging the crystal or knocking the server's hands, I enjoyed the amazing meal without an ounce of work. Something to strive for, I guess...

ANYWAY- digression and obsession with past meals aside, I made these pretzels a week or two ago, and forgot to share! The recipe comes from my friend Emily, a fellow chef who is much more adventurous than I am. Every time she makes these, they are gone in half a second (seriously, before you can blink). She gave me some tips, which I am passing along as well. Also, surprisingly enough, this is a really healthy recipe- great for snacking and guilt free!

Whole Wheat Soft Pretzels
Adapted from "Steph Chows"

Ingredients:
1 tsp active dry yeast (this is less than a packet of yeast, so if you don't have a jar of yeast like I do, check the packet information)
Pinch of sugar
1/3 cup warm water (110 degrees)
1/2 cup bread flour
3/4 cup whole wheat flour
1 Tbsp splenda blend (2 Tbs white sugar)
1/4 tsp salt
3 tbsp baking soda
1 cup hot water (as hot as your tap can get)
Sea salt or whatever other toppings you want
1 tbsp canola oil (I didn't have canola oil, so I used olive oil instead. It turned out well, but I think canola oil is the healthiest in the oil family)

1. Dissolve yeast into water with a pinch of sugar, let stand 10 minutes until the mixture is creamy colored. Mix the yeast mixture with flour, sugar, salt and canola oil, and knead until combined (this will take only a few minutes, not even 5).

Emily's tip: the dough will be a little dry this way, so you can dissolve the yeast in a little more than 1/3 cup of water, and you can let the oil overflow the tbs measurement a little.

2. Let the dough rise in a greased bowl until doubled in size, about 1 hour (my apartment is cold, so it took a little longer than this. I left it for a couple of hours while I did some studying, which worked out fine! You still won't have a ton of dough, so don't be scared if it doesn't look that big).

3. Preheat the oven to 425 degrees. When the dough has risen, pinch off a handful and roll it out into a long strand. Set aside. Repeat with the rest of the dough, about 6 times. Once all the strands are rolled out, pick up the first one and stretch it out again (the gluten will have relaxed and it should stretch further now). Twist it into a pretzel shape and place it on a baking sheet lined with cooking spray. Repeat with the rest of the strands.

4. Dissolve baking soda into hot water and stir until dissolved. Quickly dip each rolled pretzel into the mixture and place it back on the baking sheet. Sprinkle all the pretzels with sea salt, to your preference. Bake for about 8 minutes, until pretzels have browned. (You can try baking them for 8 minutes and then dropping the temperature to 350 for an additional 4-5 minutes for better browning).

5. Emily's tip: to make them even more delicious but less healthy, brush them with melted butter once they've come out of the oven! I did this, and I didn't regret it for a second.


Serve with this honey mustard sauce, and it. is. AWESOME.

Honey Mustard Sauce:

Ingredients:
1/2 cup Dijon mustard
1/2 cup honey
2 tablespoons mayonnaise
1 tablespoons lemon juice
Salt and pepper

1. Mix all the ingredients in a small bowl and season with salt and pepper (this is obviously optional- I skipped it and didn't find it lacking at all!). The sauce can be held in the refrigerator for 1 week.

Note: for storage purposes, bread can be a little funny. DO NOT refrigerate these, and DO NOT store them in an air tight container. They'll get moist and gross and you don't want that. I wrapped them in foil and left them on the counter, and it was fine. If you are worried about Sparky getting into them though... eat them in one sitting.

Tuesday, March 2, 2010

Chicken Tikka Masala

This is so good, perfect on a cold night (the spice always makes me feel warmer), and it makes a ton of food so you'll be eating for a few days. It is obviously best served with Naan bread and Basmati rice, but if you don't have/can't find naan you can just serve it with white italian bread (its cheating but its still good to dip in the sauce). And, as always, pre-chop all your vegetables!

Adapted from The Pioneer Woman Cooks

Ingredients:
3-4 Chicken breasts
Kosher Salt
Ground Coriander
Cumin
1/2 cup plain yogurt (I usually just get one of the small individual serving size cups)
2 tbs butter
1 large onion finely chopped
4 cloves of garlic finely chopped
1 piece (approx. 2 inches) fresh ginger finely chopped
3 tbs Garam Masala Spice (I found this spice at Whole Foods- you can make your own spices if you can't find it, but try hard!)
1 can (28 oz) diced tomatoes
1 tbs sugar
1 1/2 c heavy cream
2 cups basmati rice (plus 1 tbs turmeric and 1 cup frozen green peas, optional)
Optional: a handful of fresh cilantro, 2-3 chili peppers (I use serrano, and slice them into small pieces)

Note: This time around, I used a 28 oz can of crushed tomatoes because that is what I had in my cupboard. It turns out, I actually prefer crushed tomatoes because of the way the consistency turned out.

Homemade Garam Masala Spice (make your own!)
1 tbs ground coriander
1 tbs ground cumin
1 tbs ground black pepper
1 tbs ground cayenne pepper
1 tbs ground fennel seeds
1 tbs ground ginger
1 tbs ground cardamom
1 tbs ground nutmeg
1 TSP ground cloves

OR


Basmati Rice: You can make your basmati rice by the package directions, but here is how I do it.

1. First, soak the rice in cold water for 30 minutes before preparing the rice. Drain the rice through a strainer to rinse the starch away. For every cup of uncooked rice, add 6 cups of water into a large pot.

2. Bring the water to a boil, add in the rice and 1 tbs turmeric. Let it boil for approx. 8 minutes, then drain through the strainer.


3. Add the green peas immediately, stir them through, and it is ready!


Chicken Masala:

1. Season both sides of the chicken breasts with kosher salt, cumin and coriander. Coat both sides with plain yogurt. Place chicken breasts on a cooling rack placed over a foil-lined baking sheet. This gives the yogurt a place a to drip, and helps the chicken cook thoroughly. Broil until the chicken is cooked through, and starting to brown (I can't remember how long... maybe 15-20 minutes). Remember to turn the chicken so both sides can brown.


Note: my chicken never blackens (I don't know why), but keep an eye out to see if yours does.


2. In a large skillet, melt 2 tbs of butter over medium-high heat. Add the onions and stir occasionally until they start to brown. Add garlic, ginger, and 1 tbs salt. Stir to make sure nothing is sticking to the pan.


3. Add 3 tbs of Garam Masala sauce, stirring to keep from sticking. At this point, add the peppers if you are using them. Add the can of tomatoes, 1 tbs sugar, stir, and let simmer for approx. 5 minutes.


4. After the sauce has had a chance to simmer, add the 1 1/2 cups heavy cream. Let simmer for about 5 minutes. If you don't think the sauce is spicy enough, add a little bit of cayenne pepper (I can't emphasize enough- a LITTLE BIT of pepper. I accidentally put in like... a tsp of pepper and almost burned my tongue off). Chop the browned chicken breasts into small pieces, and add to the sauce. If you are using cilantro, toss in a handful.


5. Serve over your rice, and enjoy!